Showing posts with label Craft Room. Show all posts

Monday, July 29, 2013

Monday Made It's & I Won!!!

Happy Monday! Today I'm linking up with Tara for 

I am excited to be sharing a sweet little project I finished last week. I ended up painting this one in my kitchen since good old sunny Florida has been more like good old soggy Florida for weeks! I am happy to report that the sun has been shining a lot more these past few days! I have so many little projects I am working on for my classroom as well as my home and I am quickly running out of summer days to complete them! So....here goes! This homely lovely little poop chocolate brown colored shelf jumped out in my path while I was walking at the flea market weekend before last. I asked the seller what she wanted for it and she said $3, so I said....I'll take it! I know you're probably wondering why, but it is a solid wood shelf and the size is just perfect to hold lots of  read aloud books and a few other items in my reading corner in my new kindergarten classroom. I knew I could fix her right up and have her looking good in no time! Here she is, scratches, scrapes, seam filler, new feet, and all! 


Here's a little closer photo of her....isn't she cute in her pale aqua blue and red!
I painted her with a homemade chalk paint concoction. She is a very pale aqua which is not showing up too well in these photos. I had a terrible time trying to get good photos in the dreary light from all the rain! My hubby added the little feet for me. I had a basket full of wood shapes that I rescued from the trash pile at my old school. These little cubes worked well for her feet....at least I think they do. I would have preferred something a little taller and maybe a little curvy, but I'm working with what I have! The feet got a snazzy red paint job! I added the red and white polka dot gift wrap to the back for a pop of color and the red rick rack trim to the front for cuteness (is that a word). I also added buttons to the corners to cover the uneven edges of the rick rack. I already had all this in my craft room stash...:) So far....I still only have $3 in it. 


Close up of one of her sweet little feet...:)


While I was shopping for a few necessities at Wal Mart after the trip to the flea, I spotted these sweet little decals. I was looking for something else when I saw these and thought they were too cute. I love dandelions and this whole set was only $2.47. I thought they would be sweet on the sides of my little shelf, so into the cart they went! Now I am up to just under $6.00 if you include sales tax. Not too shabby in my opinion.....especially for a little darling like this! Here she is showing off her dandelions and dragonflies...:)


And here she is sitting by her reading corner partner....the chair I recently recovered. You can also see the buntings I shared last week. I love how it all works together! 
Makes me smile...:)


OK...so I know these were popular last year, but I never did make one and since I had a stash of left over pencils and all the supplies needed for this project, I decided to make a pencil vase to sit in my new classroom. I think it turned out super cute!


I had these red silk poppies left from my 4th of July decor and popped them in for now. What do you think?


I have been busy cleaning out, rearranging, and reorganizing my craft room. In doing so, I have been trying to use things I already had. You can read about that project here on my other blog if you're interested. Anywho, I came across this picture frame that a student gave me this year. Super cute, but browns are not really my color, so I gave it a quick little makeover. The three circles popped apart pretty easily and I painted them with leftover paint from the shelf project above.  Again, I had all the supplies already....paint, glitter, and glue. This will hold a picture of my kiddos on my desk...:)


Now....for a couple home made its! I love thrift shopping and bought this adorable little thingie a couple weeks ago. I paid $3 for it because I could see the potential in it! I'm calling it a thingie because I don't know what it's really called. Reminds me of a wagon wheel! Anywho...I was able to see past the ugly brown and picture her all dolled up and this is how she turned out! She got a good coat of white satin Krylon spray paint and when she dried, I knew she needed a little something, so I turned to my washi tape supply and jazzed her up a bit. She got a blue plaid around the edges and a little pink and yellow floral on the handle in the middle. I decided she should hold my salt and pepper glitter shakers and they all fit perfectly!


Another home made it was this cute little plate shelf I got the same day as the shelf above. I found it at the flea as well and paid $10 for it. I gave it a quick spray paint job with Krylon Jade. I love, love, love how it turned out. I needed this to house my white pitcher collection that had outgrown their previous home on top of my china cabinet. I also added a platter and some china plates. Every item except two pitchers on this shelf were thrifted items. The two I bought new came from TJ Maxx and Michael's (half price and with a teacher discount)! 


So, that's it for the made it's, but I wanted to share a bit of exciting news! I won a giveaway for a $25 Mastercard gift card last week from Hooty over at Hooty's Homeroom!!! Talk about thrilled! If you haven't visited Hooty's Homeroom, click on the button below and go pay her a visit. I just love her blog...too cute!

Hooty's homeroom
Can't wait to see what you all link up! I love looking at everyone's creativity...:)
Have a blessed and productive week! 
...

Monday, July 30, 2012

Monday Made It! & a Preview!


Guess what! It's my favorite blogging day of the week! Made it Monday!!! Make sure you link up with Tara over at 4th Grade Frolics and show us what you made!

First up this week is the welcome pennant banner you see above! Isn't it cute? That's a clothespin laying beside it so you can see how small it is. I plan to hang it from the wreath on my door! It turned out really cute! Below, you will see the cabinet I repurposed for task card storage. This used to be wood-look. It had 30 slots to put bills in on the date they needed to be mailed. My sister gave me this years ago and I never could think of a good use for it...until now! I think it will make excellent storage for task cards. I plan to number each slot and have each set of cards numbered to go back in the correct spot. I will also have a "menu" of the cards so the kiddos know what they are getting and don;t have to take them all out to find the right ones. Next to it, you will see the magnet board I covered in chevron fabric. It was a periwinkle colored metal originally. I had my hubby drill two holes in the top, I hot glued the fabric on and strung ribbon through the holes to hang it. I am going to glue the pom poms to magnets and use them on it. What do you think?


Next up is my gallery wall in my craft room. I put two new additions up this week. You might remember this post where I showed these vintage kitty and mouse paintings I bought for .50 each at a thrift store. They were too cute to leave in the store, so I bought them home, took a couple old frames, painted them white and they are now proudly displayed in my very eclectic craft room. You can read about my craft room here and here.


My last project for this week is my handy dandy Home Depot nail apron pocket chart! I've been telling you I had plans for these bad boys! I took 5 of them, at .77 cents each and created this sweet pocket chart!!! What do you think? I plan to get ribbon to go around the edges instead of the border, but I didn't have any to put on yet, so I temporarily stuck a couple pieces of border on. I am out of large lamination sheets so I have to wait to laminate the cards in the center. It was a cinch to make....I just ironed them and then hot glued the bottom edges with a slight overlap. I LOVE it....I knew I would when I first got the idea to make it! 
What do you think?


Here's a close-up!


Here is the Home Depot logo behind the cards.


I can't decide exactly what to use it for yet! I am hoping to get some ideas from you all...:)  In this picture, I just have a composition book in it and some rack cards from Vista Print. I am thinking about storing my Vista Print cards in the pockets. I thought about labeling the cards Monday through Friday and storing something in there that I use each day. The pockets are a little narrow for copies though. They fit a composition book great, but not a regular sheet of computer paper. If I only had one block of students, I would make 2 or 3 charts and store their interactive science notebooks in them, but that won't work for me with 3 blocks!  I know some of you creative teachers will have some amazing ideas for it! Please share them! All in all, not bad for a measly $4! 


The last picture I am going to share is just a preview of my birthday pennant banner. You might remember this fabric that I wrote about here. It is so cute! The sprinkles on it are the perfect colors for my room....
orange, turquoise, hot pink, & apple green
I have the triangles cut out, but that's it so far! 
Hopefully it will be ready next week...:)


So....what did you make?

Be Blessed!

...

Monday, July 16, 2012

Monday Made It!


I have been looking forward to Monday Made It with Tara over at 4th Grade Frolics to check out everyone's awesome creations! I had a busy week getting things ready for my daughter's new place so I didn't have a lot of time to work on school things, but I did redo one thing I made a couple years ago. Here it is.....


It's a paint can I bought and painted a couple of years ago. The dots and letters were cut out with my Cricut. It did have green, blue, red, and black fabric ties on the handle, but I removed the red and added some pink and orange to go with my color scheme for my new 5th grade class! Any suggestions as to what I could keep in it? I thought about candy for a rare treat. I always keep it on the corner of my desk because it has my name on it. 


Here's a close-up of the fabric colors. Another thing I did today was make a change in my craft room/office. I traded my daughter one of my wooden desks for her glass top one. I didn't like the metal frame it was on, so I bought 2 cheapie inexpensive bookcases from Wal Mart to put the glass top on. I put some pretty gift wrap on the back of the shelves. I have been wanting to do that to my big bookcases for a while, but it is too much work to unload them and remove the backs to cover them. Maybe some day! 
Anyway......I LOVE the way it turned out! 
Here's a few pictures.


I still need to put some things on one of the shelves, but I haven't decided exactly what I want on it yet. The one against the wall has my Cricut, laminator, and glue gun stored on it. They are easy to get to but pretty much out of sight. I am not crazy about the black desk chair, but it is comfy so I'll keep it for now! I have a chair on both sides so 2 people can sit at the desk if I have company over. 


This is one of my Pinterest projects from a few weeks ago before I started my blog. I just thought I would share since I just hung it up today! I love monograms! 


This is another project from a few weeks ago. I had an old nightstand that I was throwing out because it was falling apart. I did salvage the front of a drawer and the knobs to make a jewelry holder. I had the three green knobs in my stash and had been waiting for the perfect project for them. I love the way it turned out!


Last is the chair I refurbished for my daughter's desk chair. I bought it for a couple bucks and repainted it in Krylon's Global blue. I recovered the seat with a shirt I found at the thrift store. I loved the chocolate brown and white and the graphic design, so I cut it up and voila....from shirt to seat cover. What do you think?
I hope you enjoyed my Monday Made It's! I have enjoyed looking at a lot of yours...:)
Be blessed!
...

Tuesday, July 10, 2012

Creation Station....otherwise known as my craft room!

Today I  am featuring the space where I create "stuff"! It is my very own craft room...:) I had a vision for this space long before it came to fruition. Over my spring break, my dear hubby helped me create my space. This was my son's old room (he moved into my daughters room when she moved out) and it was painted a really bright blue, so it looks much different now! These aren't the best pics, but it is a small room and it's difficult......nearly impossible to get good shots! 
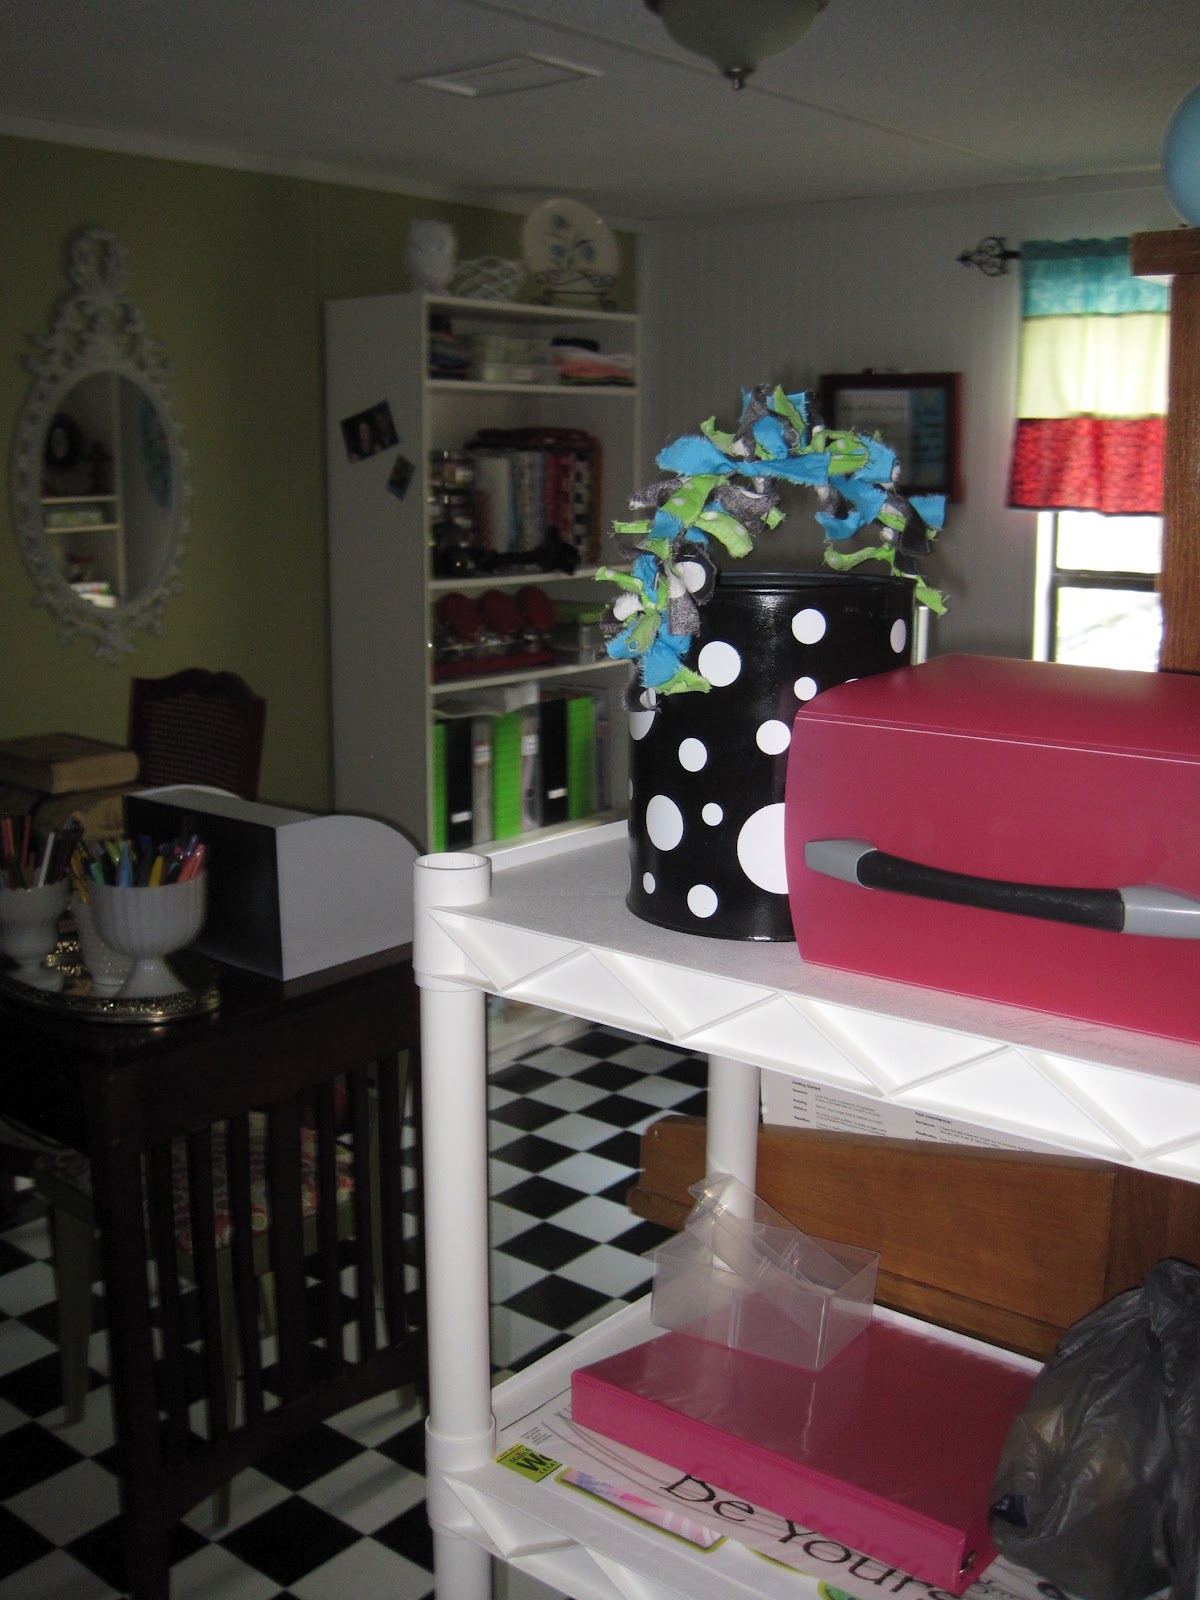
This one is taken from the door. The white shelf you see close up is not usually there, but I found it at a yard sale for $3.00 Saturday and I thought I would sit it there to put school projects and things on until I take them to my new classroom! I need to add some hot pink and orange to my bucket handle on top! BTW.....I didn't replace the floor, it's the floor we put in my son's room to help alleviate allergies....and he used to race go-karts so it just fit. I love the checkerboard with all my junk.....I mean stuff!
This is in a little corner directly in front of the door. It is an old record cabinet I found at a yard sale for $15.00! I fell in love with it and didn't have to do anything to it, although I am sure one day I will give it a cute little makeover! The box on top is my To Pay, To Do, To File box that I <3! I got the idea from Jody over at Pleasant Home a couple of years ago. I love it! On top of that are my S & P shakers full of different colors of glitter....idea courtesy of Pinterest.On the wall are another idea I got from Pinterest....shoe box lids covered in fabric to look like covered canvas!
Here is one of my shelves full of stuff....felt, fabric, papers, beads, etc. On top are my thrift store owl I painted white, my $1.00 Dollar General bowl that started out a clear green plastic. I loved the shape and look of it though and there's nothing a few coats of spray paint can't fix! Also on top is a cute, vintage plate my aunt gave me that was in a $2.00 box of junk she bought at an auction. I <3 it! 
This is my other shelf full of stuff! Yeah....I have a lot of stuff....:):):) This one holds paint, more scrapbook paper, old picture albums, glue, cards, and a few pretties....:) My favorite is the ballerina kitty my sweet daughter, Miranda gave me when she was little (she's 22 now and about to graduate with her Bachelor's in Social Science from Florida State University on August 11th). Another fave is the ladybug....my group of girlfriends love ladybugs (there's a story behind that ;)...lol). To the left is an old clock I bought at a local thrift store and redid....I <3 it!
This is my window with my little plant ledge hubby built for me...:) I made the curtain and there's that cool old clock again! The little cart under the window I bought at a thrift store for $2 or $3. I painted it red and love it now! On the wall above the tv is a picture frame dry erase calendar I made (another Pinterest idea.....imagine that!).
Here is one of my two desks (I am trading my daughter this desk on Friday when we move her into her brand spanking new condo. I am getting her glass top desk and putting it on two short bookcases...I can't wait!) On top are some pieces of milk glass I have bought at thrift stores, consignments shops, and yard sales for an average of  fifty cents each! The lamp is a DIY project I did recently with a yard sale lamp I had in my stash! Both of the chairs are DIY projects too...I already had the red one, and I gave $3 or $4 for the green one.....a little spray paint and fabric and voila! Behind the desk is the closet...full of lots more crap....er, I mean stuff! Oh....there's my cat Bashful on the floor....I just noticed!
A front view of the chair...:) On the floor are the trash can and a couple things I am waiting to hang when I get the glass top desk.
Here's the messy desk....sorry, I'm just keeping it real! I've had it for years...I bought it for $50 back when I worked for the postal service. It was an old mail sorting case. You can see a few of the dividers I left in. I just didn't need that many small compartments. One day I am going to redo the shelving, but that's a future project! On top are boxes of pictures and my recently repainted canisters. I still need to drag the Cricut out and label them!/ To the right is the white shelf by the door with my school things and to the left is one of my big white shelves.
Here is my tv stand, old sewing box my mother-in-law gave me years ago, and my wrapping paper basket. The tv stand was bought at the Goodwill for a few bucks....$5 I think! It's been a couple years. Under the tv is a jar of ribbon &my old soda shop straw dispenser (courtesy of my favorite aunt)  with silverware for some future jewelry projects.
Another messy area of the room is in front of the closet. These are projects I am currently or about to begin working on. The $2 chair is going to be all gussied up to take to my daughter to go with her new desk. There are several shelving projects....all yard sale & thrift store items that I am finding a home for. 
Here are part of the decorations for my daughter's graduation party next month! We are doing an Oh, the Place You'll Go theme....sort of! She loves to travel and we are decorating her new room in a vintage travel theme so she can use these things in her new room. The scrapbook paper and old atlas are for a bunting project and a mod-podge project. Check back in a few weeks for that!
NYC is her favorite city and I am making her a cool new shower curtain with this fabric....that's today's project with my dear mama...:)
This just makes me smile...:) I still need to paint the mirrored tray frame, but I <3 this! and last, but certainly not least.......
two of my kitties.....Cruella and Bashful! 
They dearly love to sit and gaze out the window, but neither of them are too fond of the great outdoors!
I hope you enjoyed the tour! I am proof that you can have a really cute crafty space for very little $$$! 
Be blessed...:)